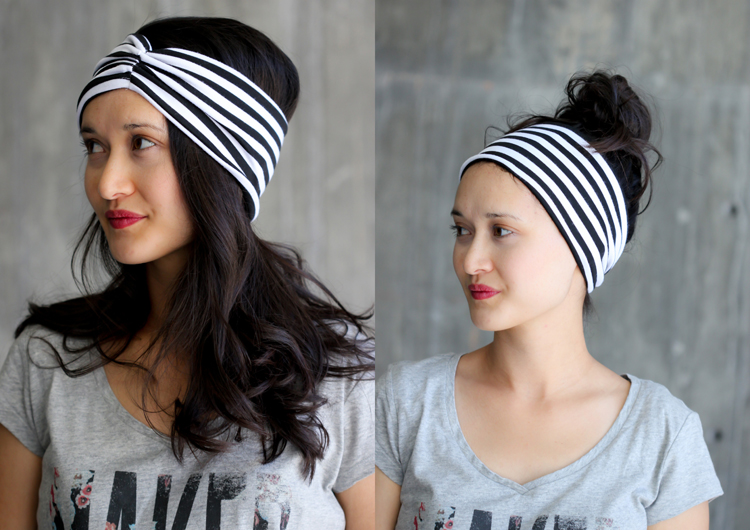
I've always wanted to make a bunch of headbands for myself and as gifts. Here are a few tutorials and links to patterns for three different headbands. These were sourced from online searches.
This is a great pattern for a knotted headband - for a baby 12 months or older. I'm going to adapt the pattern to fit a tween and an adult.
This is a similar type of headband with the knot on the top however, the fabric wraps around your head a couple of times and floral wire is used to to maintain any shape you desire.

The great thing about these is
that there’s WIRE in
them so you can create whatever shapes you want and it stays put! You have the
freedom here to get creative, maybe even weave it through a side braid?! Plus,
you can choose all sorts of different fabrics and do a variety of thicknesses
and lengths! I’ve already made 3 :).
Here’s how you do it:
Step 1: Gather materials needed – Floral wire, Fabric, and basic sewing tools.
Step 1: Gather materials needed – Floral wire, Fabric, and basic sewing tools.
Step 2: Cut a strip of fabric wide enough to fold in half
(can be as thick as you want!) but make sure it’s long enough to go around your
head once or twice with some extra on the ends. I liked making mine super long.
Step 7: Feed the wire through the fabric tube.
Here’s
me putting my hair wrap on:

This last headband is a bulkier one, made with knit - stretchy fabric. It's important to use a jersey or ballpoint needle when using this fabric.
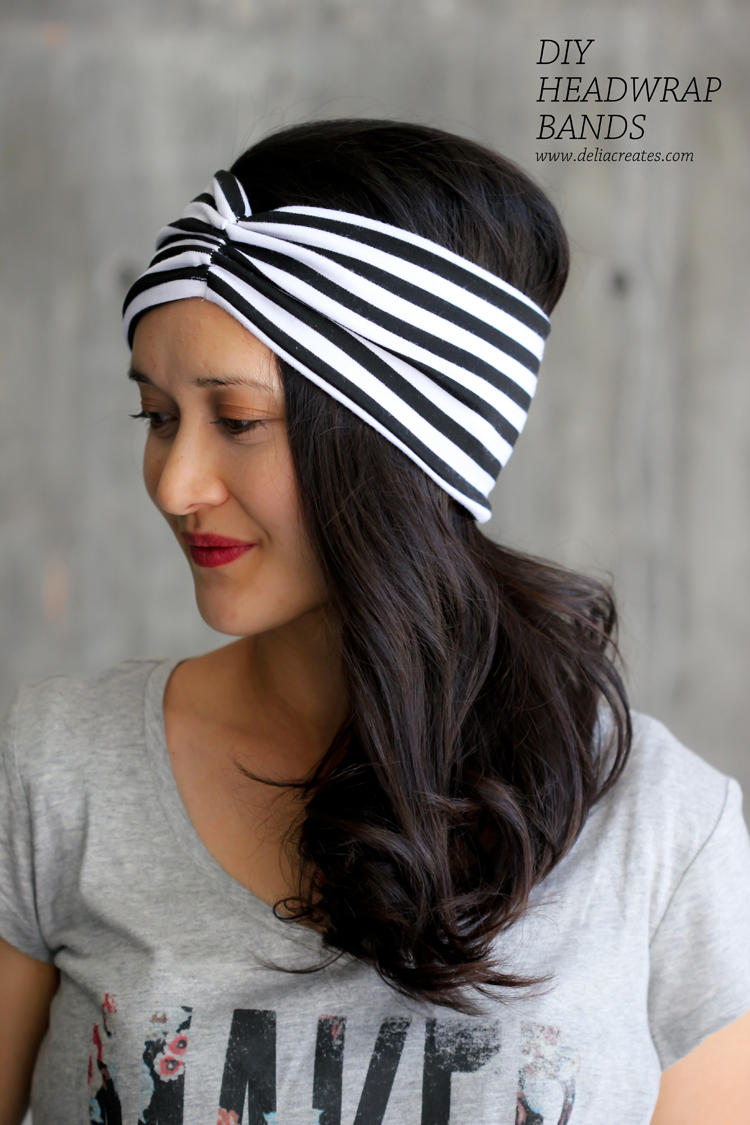
Materials:
Knit Fabric*
Jersey or Ball
Point needle (for sewing with knits)
Hand sewing
needle
Matching thread
Basic sewing
supplies (sewing machine, scissors, pins, etc.)
*You can use almost any kind of knit fabric. Light
weight knit usually has more stretch to it and its edges tend to curl, so it’s
a little trickier to sew, but will provide a more flexible fit.
First, measure your head.
LENGTH
Measure around your head from forehead down to the upper part of your neck and then back around.
LENGTH
Measure around your head from forehead down to the upper part of your neck and then back around.
For a mid-weight knit that is a little stretchy but
bounces back easily (has good recovery), use your exact measurements. It will
end up being a little bit smaller because of the seam allowances, but it will
stretch to fit your head nicely. If your knit fabric is really stretchy,
consider subtracting an inch from your head measurement. The fabric needs to
stretch some to fit your head without falling off.
If you are making the headbands to sell or as a
gift, here are general length measurements for a
mid-weight knit with good recovery:
Toddler = 19″
Girls =20-21″
Women’s = 22″
Girls =20-21″
Women’s = 22″
WIDTH
When cutting the width, decide how wide you want it, then double it and add 3/4″ for seam allowance (3/8″ x 2).
You can cut the width of your headwrap band to your preference. If you would like the thick headwrap look, the following is a good guideline:
Toddler = 6 3/4″
Girls = 7 3/4″
Women’s = 8 3/4″
Now, let’s sew!
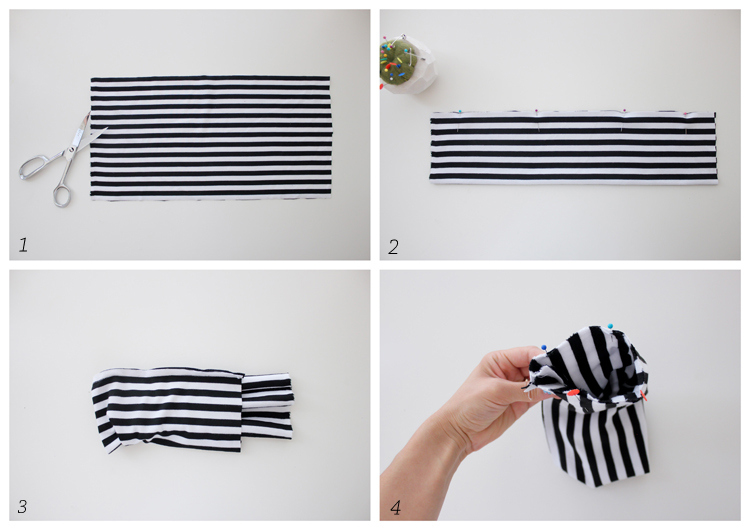
1. Cut fabric (see above)…
2. Fold it lengthwise and pin the long edges
together with right sides facing. Sew along long edges with a stretch stitch. I
used a narrow-modified zig zag stitch. A serger overlock stitch works great as
well.
3. Pull out the tube of fabric, you have just sewn,
halfway so that the two short ends meet with right sides still facing.
4. Make sure the seams line up (so the band won’t
be twisted) and pin the short ends together. Sew around leaving a 2-inch
opening unsewn. Make sure to back stitch when you start and stop sewing, so
that the opening won’t rip open any further when you turn the headband right
side out.
 \
\
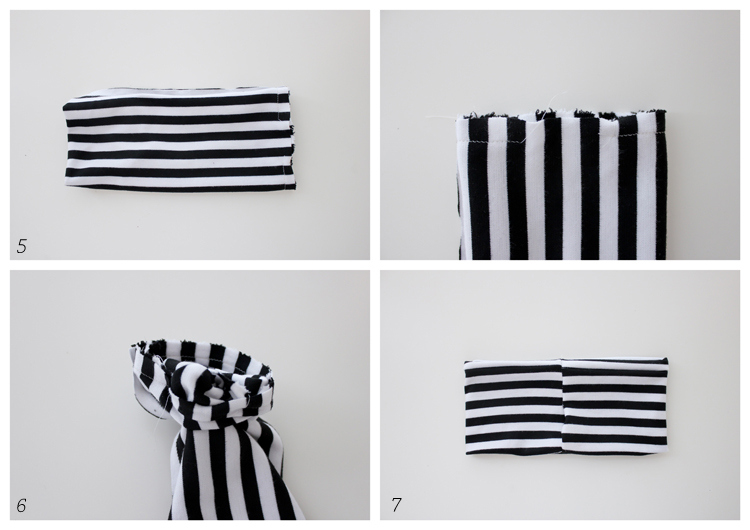
5. This is what your fabric should look like now.
6. Through the opening, pull your headwrap band
right side out.
7. Now you’re ready to do some hand sewing. If your
pattern/stripes don’t match up quite right, don’t sweat it! You are going to
ruche right on the seam and won’t notice it at all when you’re done.
Before we get to that though, we need to thread a
hand sewing needle and knot it off.
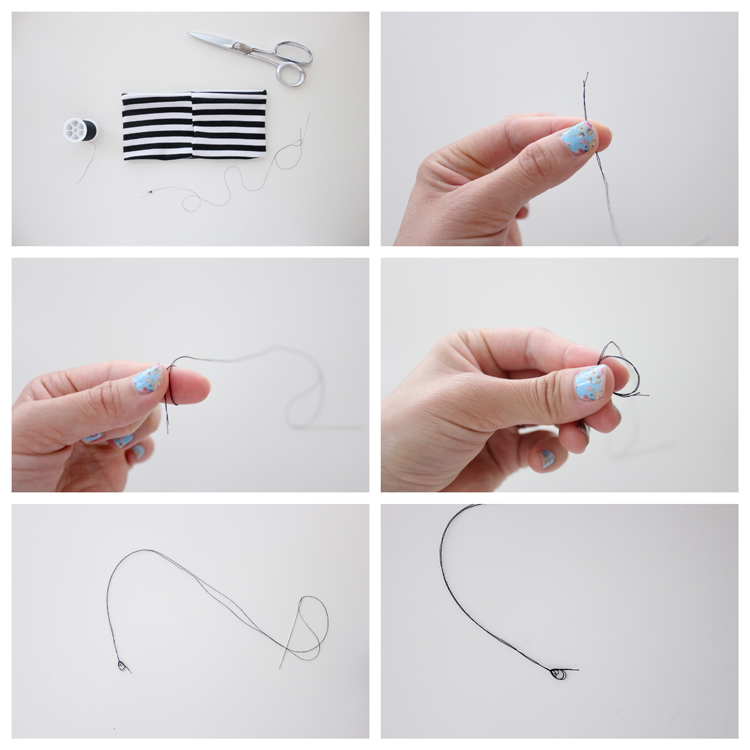
Double up your thread, wrap it around your finger,
roll the loop between fingers and pull needle end tight. Ta da! A knot.
It’s a messy, chunky knot, but that’s what you want.
Okay, let’s get back to sewing.
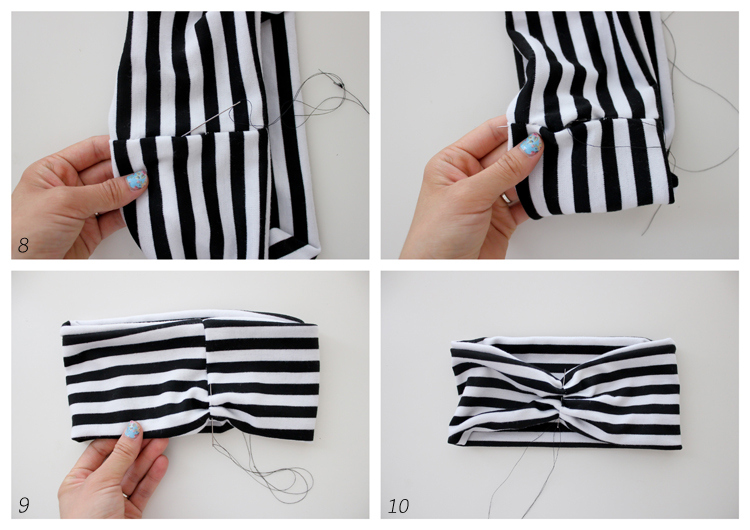
8. Insert your needle into the opening at the seam
and push the needle out the side (or really bottom) of the headwrap. The knot
should now be encased inside the headwrap.
9. With the needle at the bottom of the headwrap,
push it up through the seam of the head wrap, weaving it in and out of all
layers of the head band as you go. You also want to close up the opening
as you go. To accomplish this, weave back and forth between both sides, just
slightly as you weave upward.
10. When you get to the top of the headwrap, turn
around and weave it back down the seam in the opposite direction. Repeat this
about three or four more times, until the headwrap is securely ruched or
gathered. Knot it off in a discreet spot and clip your ends.
Headwrap band done and ready to wear!
You can wear the ruching in the front or flip it to the back, so the front has a smooth look.
You can wear the ruching in the front or flip it to the back, so the front has a smooth look.
